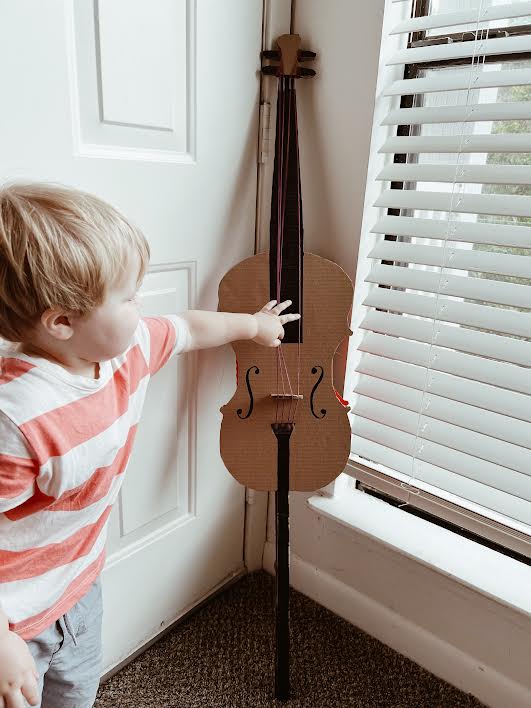
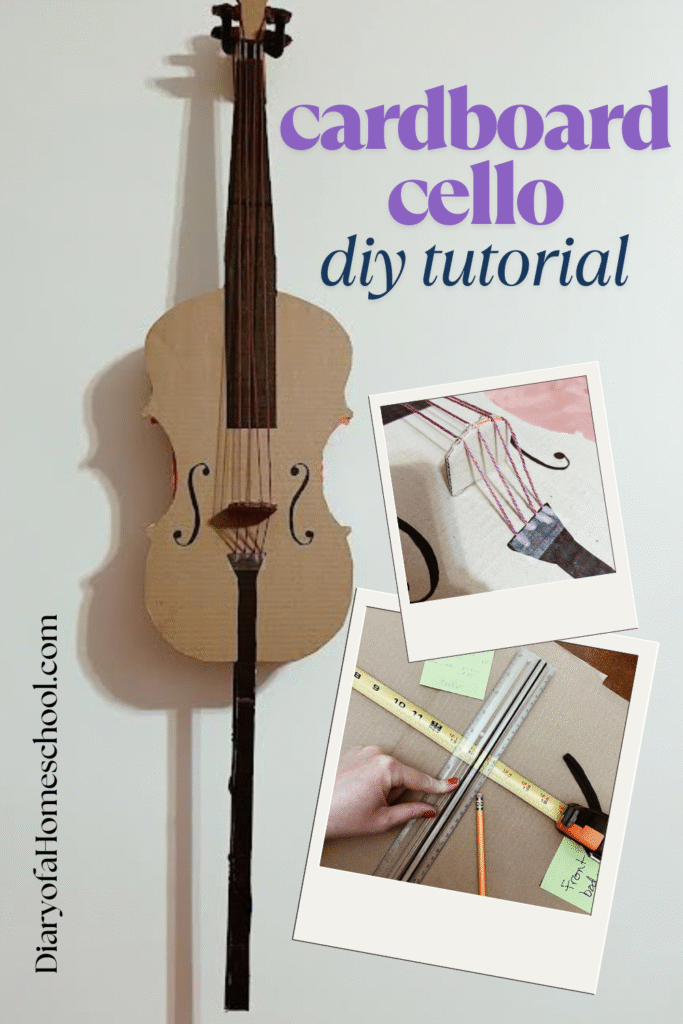
So your kid is starting cello lessons the Suzuki way? And your teacher asked you to make a child-size instrument out of cardboard? You know she’s legit. Making a child’s first instrument out of cardboard when he is first learning how to hold such a fragile and expensive object is a tradition that dates back to Shinichi Suzuki himself. (His biography is fascinating – you can read my book review.) In this post I am sharing a step-by-step tutorial of how I made my son’s first cardboard cello.
What You’ll Need
- measurements for your cello size
- sufficient amount of cardboard (about two very large boxes)
- picture of a real cello
- heavy duty scissors
- Exacto knife (aka, utility knife)
- glue gun
- ruler
- tape measure
- pencil
- black Sharpie
- string or yarn and tape (if you want to be extra)
Measurements & Cardboard
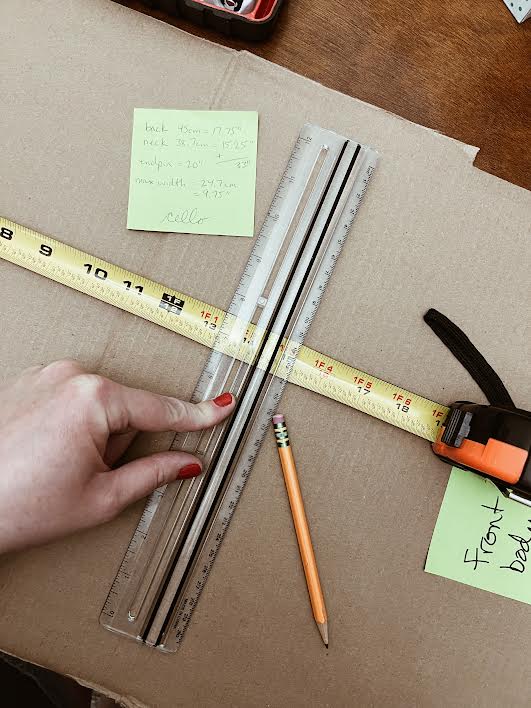
According to my research, the smallest size cello scale is 1/10 of a full size. The length of the body alone is 17.75″ (45 cm), the neck is 15.25″ (38.7 cm) long and the max width of the body is 9.75″ (24.7 cm). And the endpin can extend up to 20″.
I collected quite a bit of cardboard from Costco before undertaking this diy project, but I only ended up using two large boxes. I disassembled the boxes so I could get the entire cello from scroll to endpin on one piece of cardboard. Then I did separate pieces for the back of the body, back of the neck and back of the endpin for reinforcement. I also stole a section from a box that was already designed to fold into a little box. This is what I glued between the front and back pieces to give the cardboard cello some depth.
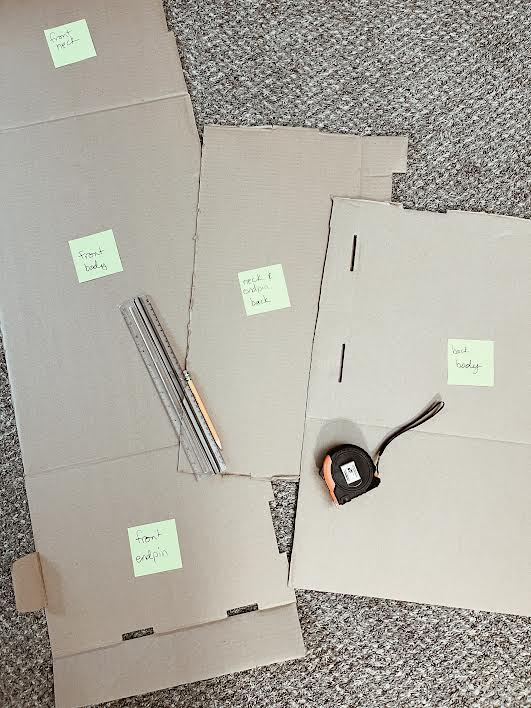
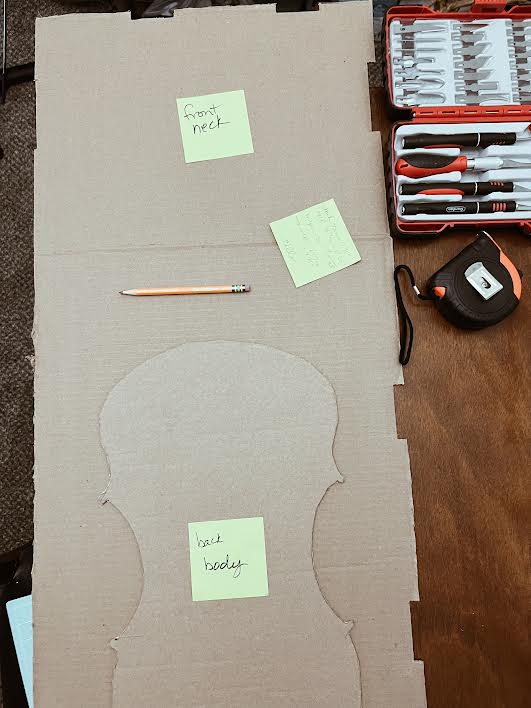
Step 1: Cut Out Your Cardboard Cello Pieces
I was constantly getting interrupted in this project, so I made sure to keep my pieces labeled – either pencil on the cardboard itself or stickies. That way you can remember which piece is the front vs the back and which end is up.
Step 2: Trace Your Cardboard Cello Shape
Using the measuring tape and ruler, mark off where the neck meets the body and where the endpin meets the body. Now you can start tracing the cello shape on the large piece of cardboard.
Even if you’re a string player yourself, I recommend pulling up a picture of a cello online for you to follow along with so you know exactly where the curves are.

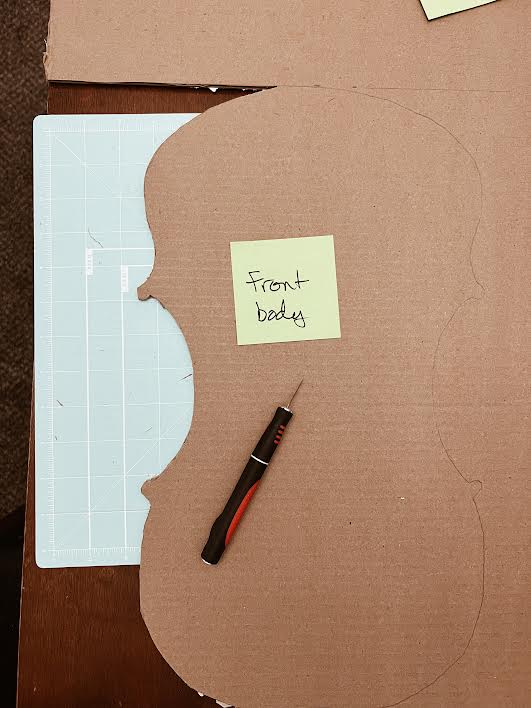
Step 3: Cut out Your Cardboard Cello
On that one large piece of cardboard, I used scissors to cut off the big pieces of unwanted cardboard around the neck and endpin. I then went in with an Exacto knife (utility knife) to get the sharp corners and make it look sharp.
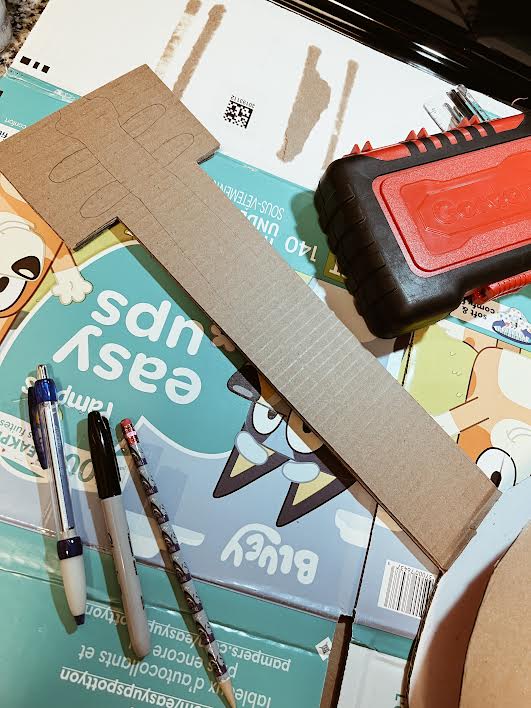
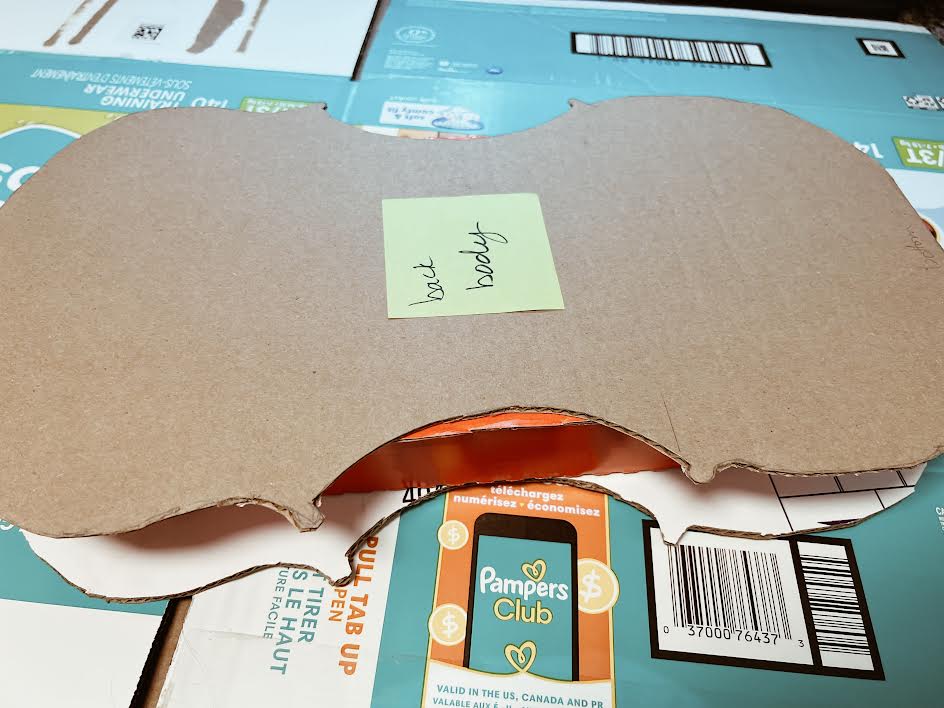
Step 4: Attach Your Neck and Endpin Reinforcement Pieces
Because the cardboard cello needs to be sturdy enough for a three-year-old to hold and it’s a long instrument, doubling up on the cardboard is crucial. This was true of my daughter’s cardboard violin as well and it was much, much smaller. So I traced and cut out a back piece for the neck, a back piece for the body and a back piece for the endpin. Then use a hot glue gun to glue on the neck and endpin first.
I recommend keeping your neck piece very simple, gluing the reinforcement on the back, then going in with the Exacto knife for extra detail. Yes, it’s difficult to get the knife through two layers of cardboard. But I thought it was easier than trying to match up two detailed pieces. Do whatever works for you. It’s just something to keep in mind.
Step 5: Add Depth (Optional)
If you want to add some depth to make your cardboard cello more 3D, glue a box between the front and back pieces of the body.
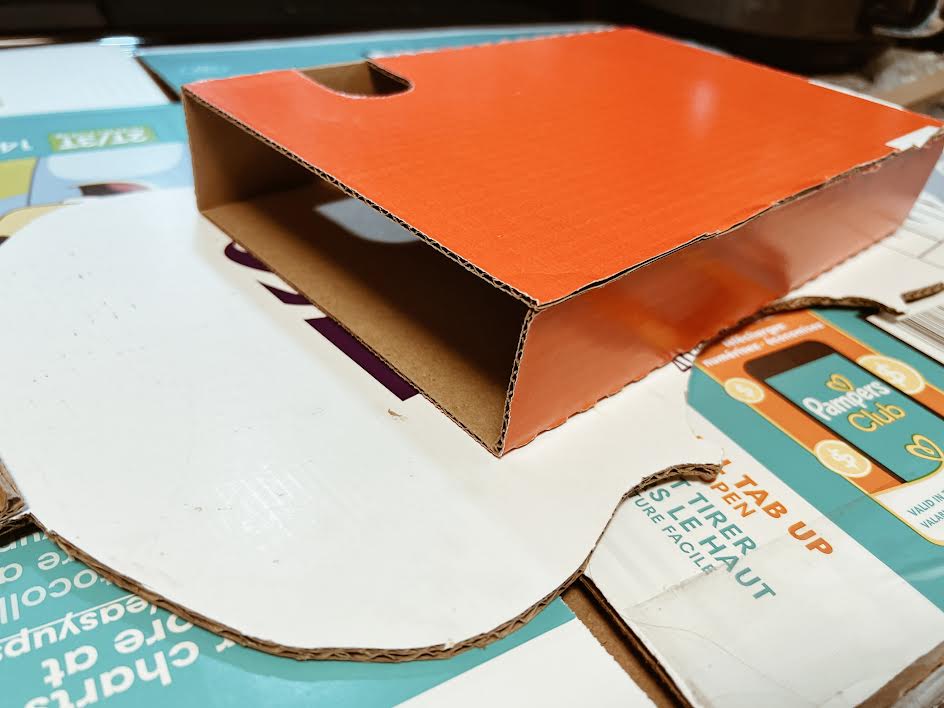
One of the Costco boxes I disassembled had a convenient piece that was already a good shape and size for this purpose. If I hadn’t had this piece, I would have used an empty tissue box(es).
Step 6: Add Details
When it comes to details, I tried to make my cardboard cello pretty. But if you want to go the minimal route, you still need a few details to ensure the cardboard cello will be usable for practice purposes. Your student needs to know where the bow will be placed. So at the very least, I recommend adding the f holes, marking where the fingerboard extends into the body and where the bridge would be.
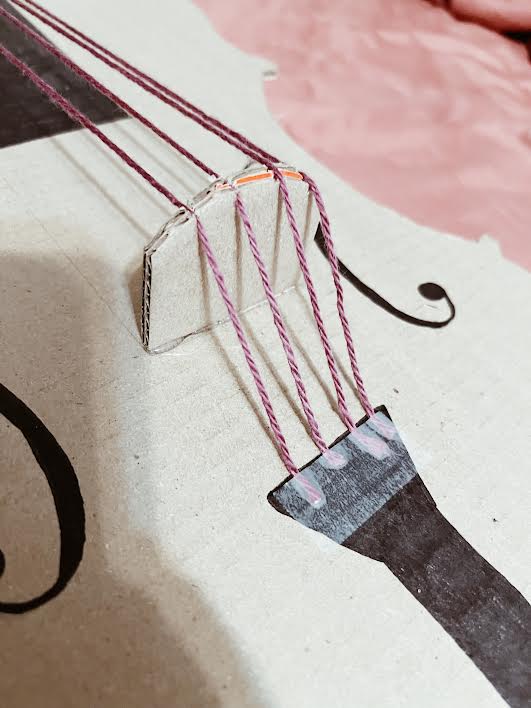
I cut out some more cardboard that was shaped like a bridge (two pieces hot-glued together) and used the hot glue gun to attach the bridge to the body.
Step 7: Add Strings (Optional)
If you want to be a bit extra, go ahead and put strings on your instrument. I only had yarn and it wasn’t even silver. I just wrapped it around the appropriate pegs and set them in the bridge. I used the Exacto knife to cut little slits into the bridge for the yarn to rest in. Then I just taped them down to the tailpiece. The tape isn’t super glamorous, but it’s working for now.

Final Notes
Yes, it’s a little on the fragile side, but that’s probably a good thing. Young children need practice handling fragile things and that’s the entire point of using a cardboard instrument anyways.
As for the endpin, that is a wholly foreign concept for me, a violinist. I left it long and I’m going to see what my son’s cello teacher says. I’ll either bend it or cut it off short to fit his needs.
And then for a bow, his teacher requested we order a “Twinkle bow” which was actually adorable. A super tiny real bow to practice bow holds over the summer before he starts lessons in September. I can’t wait to see them together and for him to start taking cello lessons. * excited squeal *
UPDATE: This cardboard cello is holding up remarkably well after a few weeks of real use in lessons and group class, but because of the amount of weight on the endpin, I did end up supergluing a wooden dowel behind the front piece. It extends from the scroll all the way down to the tip of the endpin and provides the needed support.
Have you made a cardboard instrument for Suzuki music lessons? How did it go? Do you have any tips or tricks to share?
Keep Reading About…
Shinichi Suzuki and the Suzuki Method: Suzuki Biography Book Review
Music Practice Tips for Kids: Effective Music Practice at Home
Balancing rigorous homeschool with intense extracurriculars (like music): Homeschooling and Extracurriculars


Leave a Reply