Last summer, I made my 3-year-old son a cardboard cello because he was starting Suzuki cello lessons. This summer, my 18-month-old daughter – who is waitlisted to start viola lessons once she turns 3 – is going crazy to play her own string instrument. Because playing cello requires sitting on a stool (access to little hands!), I have to keep my 18-month-old occupied while my now 4-year-old practices. I figured I might as well make her her own cardboard viola so she can “practice” with us. So if you’re in the market for a cardboard instrument, here is how I made the cardboard viola (same size as a violin at this stage). Trigger warning: I will use “violin” and “viola” interchangeably throughout this blog post.
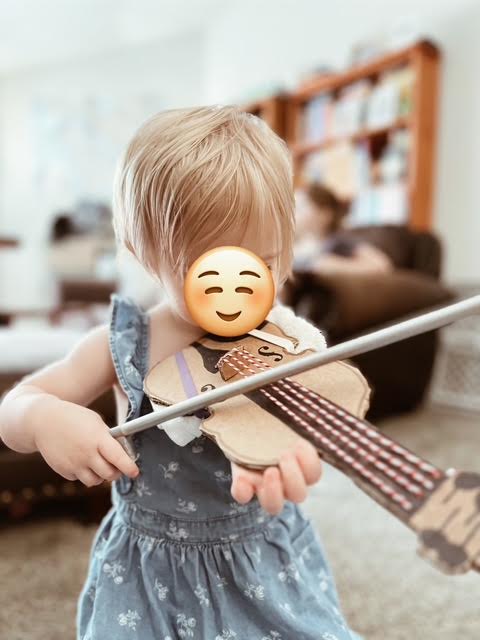
What You’ll Need
- measurements for your violin or viola size (Free printable template for toddler size by joining my email list below.)
- sufficient amount of cardboard (one large box for a tiny viola)
- picture of a real violin or viola
- heavy duty scissors
- Exacto knife (aka, utility knife)
- glue gun or stick glue
- ruler or tape measure (depending on the size of your instrument)
- pencil
- Sharpies: black and bronze or brown for decorating
- string or yarn
- awl (if you have one – the embroidery needle might work if your cardboard isn’t too thick)
- embroidery needle (or heavy duty needle)
- sponge or folded-up washcloth (shoulder rest) and 2 rubber bands (to secure in place)
- something for a bow (short wooden dowel or, in my case, a broken hanger with duct tape in the shape of a frog)
Measurements & Cardboard
For this tiny viola, I copied my oldest daughter’s first cardboard violin. Because she hadn’t yet turned 3 at the time I made it, I used the measurements for a 1/32 size violin, so the body (not including the neck) is approximately 7.5 inches long. (If you want to skip the measurements, scroll down to the bottom of this post, sign up for my email list, and you’ll get a free pdf template of this exact shape.) From my research, very young viola students (unicorns, apparently) either start on violins and switch to violas when they can hold the smallest available size (10-inch body comparable to a 1/8 size violin). Or they start with a size-appropriate violin with viola strings. I have yet to talk to our future viola teacher about how she deals with this. In the mean time, my 18-month-old simply has a tiny cardboard viola.
Step 1: Cut Out Your Cardboard Violin Pieces
In order to have a nice brown side on the back, I use two pieces of cardboard and glue them together. It’s an extra step, but it looks nicer to me than having some random colour or advertising on the bottom side of the instrument. So I make sure to have enough cardboard to cut out the instrument twice. Note that doubling up on the cardboard also helps make it sturdier.
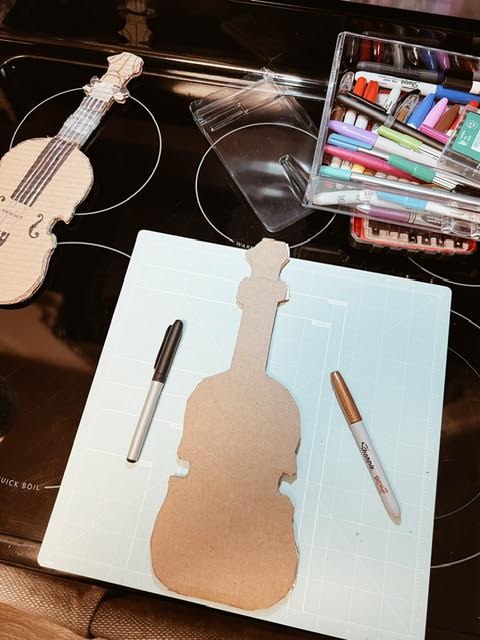
Step 2: Trace Your Cardboard Violin (or Viola!) Shape
Use the ruler to measure the body size and mark off where the neck meets the body. Then use a pencil to start tracing the violin shape on the large piece of cardboard. Even if you’re a string player yourself, I recommend pulling up a picture of a violin or viola online for you to follow along with so you know exactly where the curves are. It does not have to be perfect. I just try to make it look as realistic as possible. Except the pegs. I make those symmetrical on purpose. The more symmetrical the front, the better the back side will line up if you trace the front to get the back. Lose some of the realism for the sake of your sanity. Prefer to trace instead of measuring? Download the free printable template at the bottom of this post.
Step 3: Cut out Your Cardboard Viola
I use scissors to cut off the big pieces of unwanted cardboard around the neck, then trace my pencil lines with an Exacto knife (utility knife) to get the sharp corners and make it look nice. This is the most time-consuming part.
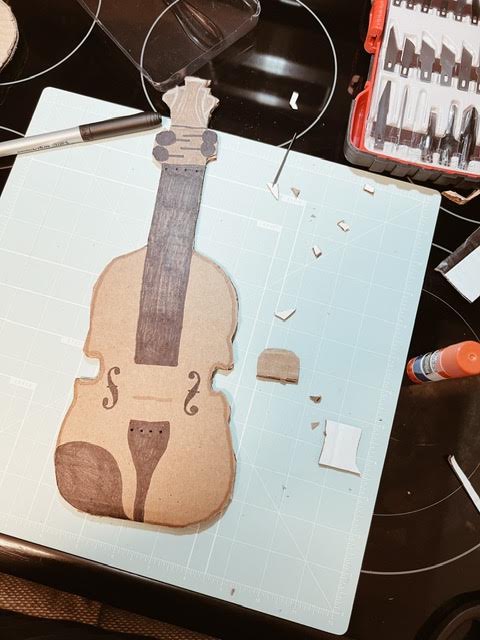
Step 4: Colour in the Details
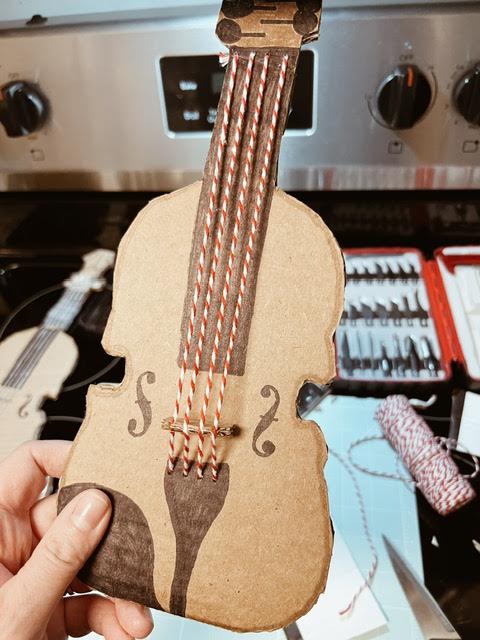
Use a black Sharpie to add detail to the cardboard viola (or violin). I also used a metallic bronze Sharpie to outline the viola just to make it look a bit nicer. Once you colour in the neck, tailpiece, and the f-holes, you can estimate where the bridge will go and how big it will need to be. I eye-ball all of this. No exact measurements. This cardboard viola is meant to occupy an 18-month-old. I am not a professional luthier! Recite this to yourself if you feel your type-A string player perfectionist mentality start to take over…
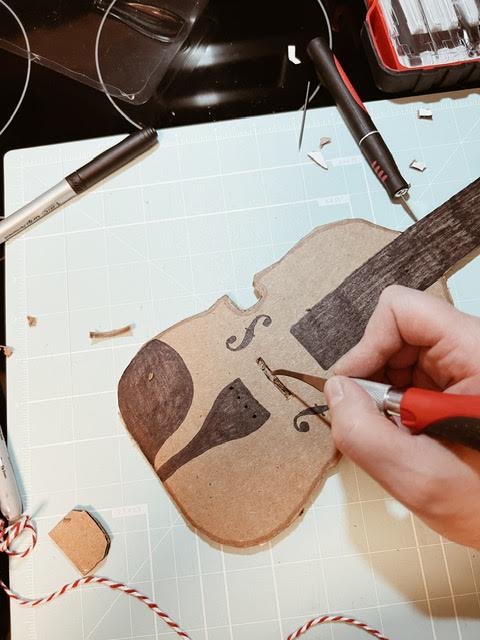
Step 5: Add a Cardboard Bridge to Your Cardboard Viola
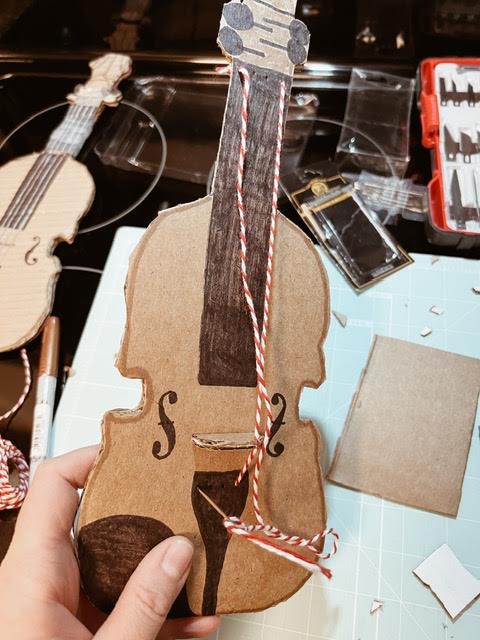
I literally just used a blade to dig out a shallow trough for the bridge. (I literally make this stuff up as I do it. Don’t ask me why.) Then, I cut out a bridge-shaped wedge of cardboard and stood it up in there. Remember, the “strings” will keep it in place. Of course, using a hot glue gun to secure it in place would probably be more practical before handing this to a toddler. I didn’t bother though.
Step 6: String Your Viola
Now for the fun part: use a sharp pointed object like an awl to put holes in your cardboard violin, at the top by the pegs and down past your bridge. I used an embroidery needle to get my string through the holes and just put knots on the back side of the strings, top and bottom. I then took the Exacto knife and made little marks in the top of the bridge so the strings could rest in them. It helps keep the strings in place and thus keep the bridge in place.
Step 7: Add the Shoulder Rest to your Cardboard Viola/Violin
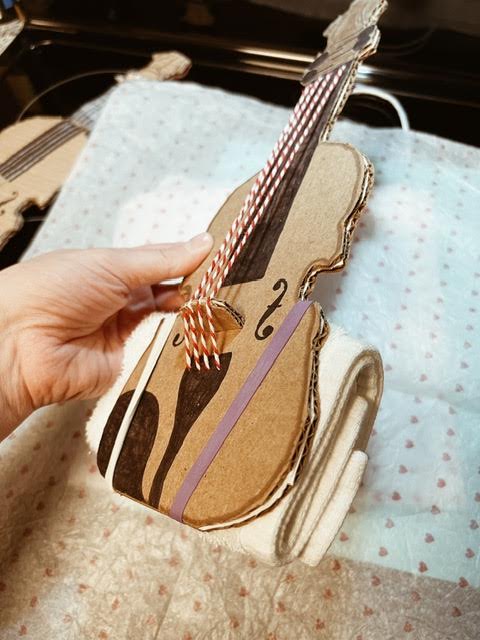
Using two rubber bands, secure a folded washcloth or sponge to the back of the cardboard viola or cardboard violin to mimic a shoulder rest. No, the depth of the instrument won’t be 100% accurate, but it’s authentic enough for a toddler to get the feeling of holding a viola or violin.
Final Notes
Yes, it’s a little on the fragile side. With my oldest daughter’s cardboard violin (the prototype for this cardboard viola), I ended up taping a ruler to the back to keep it straight. But we only get this cardboard viola out for the few minutes that my son is practicing cello. And no, I do not expect it to hold up until she turns 3 and starts viola lessons. This cardboard viola is literally just to help my 18-month-old feel included in a family of string players.
Have you made a cardboard instrument for Suzuki music lessons? How did it go? Do you have any tips or tricks to share?
Keep Reading About…
Shinichi Suzuki and the Suzuki Method: Suzuki Biography Book Review
Music Practice Tips for Kids: Effective Music Practice at Home
Balancing rigorous homeschool with intense extracurriculars (like music): Homeschooling and Extracurriculars


Leave a Reply